GART 250 : Agent Fitz' Room Part 4: Materials, Materials and More Materials!
- emilykenny20
- May 14, 2023
- 4 min read
Apart of my brief for this project was improving my skills as a technical artist. I wanted to make at least four custom textures that would be repeated throughout the scene. this blog post is going to be breaking down the materials , where and how they where used and explaining my design choices.
Substance Designer Materials :
The industry standard for Texturing is definitely Adobe Suite I was considering exploring other options like 3d coat as I had used it before in college but I found substance designer the most accessible due to my student license.
Basic material :
The basic material is what's applied in the scene probably the most my colour palette for the scene was initially black, orange and yellow but I found that made the scene far too dark and so I choose to accent the oranges with navy instead as not only are they complimentary colours but the darker parts of insects such as wasps often reflect blues and greens when it catches the light.
Below is how I created the basis for a small height variation and AO with the cracks that's the base for the overall materials pattern. this was made using a modified cells node , gradient node and a blend node set to copy.

Below is the section of the graph for the roughness of the material I used various nodes like the 2d transform to get the streaks to deform in the way I want and blur to reduce surface detail.

The entire material graph:

Metal grid material:
the metal grid material was a little hard to achieve it required a lot of transforming bevelling and blending to get the pattern and correct depth of the grids. as seen below:

Below is the rest of the graph where you can see how I've gone about doing the roughness metallic and colour maps.


Metal hex Material
Similarly to the metal grid material the metal hex material was done with the same method of layering shapes on top of each other to get the desired effect, I wanted to make a honey comb material that looked like it could absorb sound and would be used for select walls within the scene

Closer look at the ambient occlusion node :

Roughness graph:

Entire graph:

Overall I think I got my desired effect with this material it was very fun to make albeit a bit complex starting out.
Square material:
This material was pretty much the basic material with Square tiles and more depth I definitely think its rather simple but effective and is the material that probably looks best in engine.


Kitchen tiles:
The kitchen tiles was made with the same method and techniques as the others but this time with some height variations within the tiles themselves to avoid making the material looking flat.

Chair fabric material:
This was a fun material to attempt it was more of a challenge for me to make a believable fabric material with depth and ripples reflecting on it there's a lot that I could improve on next time like maybe adding loose thread and more fuzz on the material but overall I'm happy that I made the fabric that was use for the office chair in the scene.


Floor Materials:
I used the same methods to create the floor material below but this one ended up going through some variations. Progress shots are shown below.


I ended up making another floor material with different tiles and roughness variations for the main floor.

Concrete:
I did go into this project saying I wanted too steer away from the grungy textures and objects I usually rely on but I couldn't help but make this texture for the concrete walls outside of the room visible from the windows.

UE5 Materials :
Rain Glass :
Probably one of my favourite effects in the entire project was this material , I followed a few tutorials to get to this point and I learnt a lot of techniques from this that I used for the other unreal materials/effects in the scene.

The full graph :

Glass :
The glass was a very simple material to make only requiring a few parameter nodes for the metallic, roughness and opacity and the use of a Fresnel node the b value is the refraction value for glass 1.52.

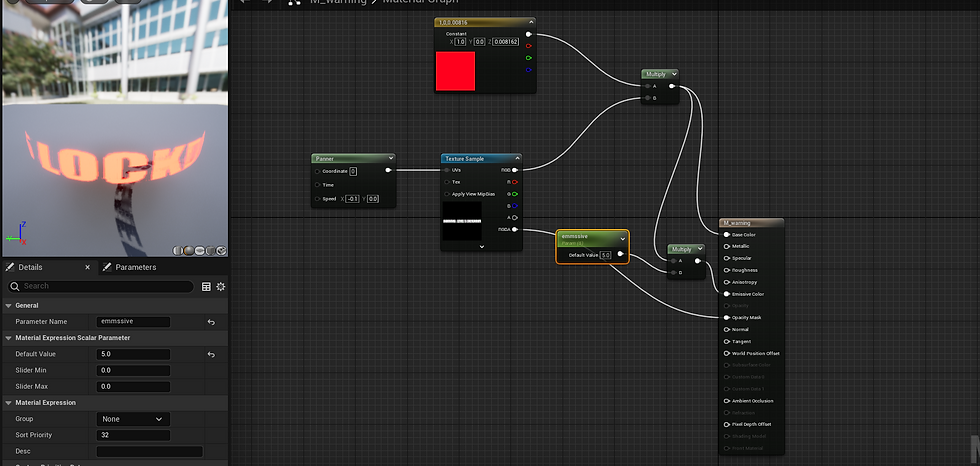
Emissive :
Emissive are unbelievably simple but I found them to be a really effect part of the scene.

Blinking Emissive:
One of my stretch goals was to have blinking light after playing around a bit I found that use the time node and a param node that would control the frequency plugged into a sine node (in math terms if goes between the values 1 and 0) that the lights would start to blink or pulse dependent on the frequency variable. this is the same method I used to make the red lights on the cameras and the desk lights blink and pulse in the scene too.

Hologram :
The hologram used a few fun nodes like the mask and panner nodes these are what allowed the stripes to move down and creates that animated effect.


Textures in engine:
(Top row is materials made in ue5 bottom row is designer material)


(For References please look at the end of this blog series )


Comments